
Do you ever crave a warm, chocolatey dessert but don’t want to spend hours baking? This Oreo Mug Cake recipe is the perfect quick fix for your sweet tooth!
With just three simple ingredients and a microwave, you can make a soft, fluffy, and delicious single-serve cake in under 2 minutes. Whether you’re a chocolate lover, an Oreo fanatic, or just need a fast, no-bake dessert, this mug cake recipe is the ultimate solution.
🍫 Why Everyone Loves This Viral Mug Cake
The Oreo Mug Cake Recipe exploded across TikTok, Instagram, and YouTube for a simple reason: it’s incredibly easy and unbelievably satisfying.
Here’s what makes it irresistible:
Perfect single serving:
It’s portion-controlled (well, sort of… until you go for a second mug!).
Minimal ingredients:
You probably already have Oreos and milk at home.
Speed:
From craving to cake in less than 5 minutes.
No baking skills required:
You don’t need to be a pastry chef. If you can crush cookies and stir, you can make this cake.
Customizable:
Want to add chocolate chips? Peanut butter? Nutella drizzle? Go ahead—this cake is your canvas.
If you love Best Carrot Cake Muffins or other quick desserts, this one is a must-try!
🔥 Mug Cake vs Traditional Cake
Why choose a mug cake over a regular cake?
| Mug Cake | Traditional Cake |
|---|---|
| Ready in under 5 minutes | Takes 1–2 hours |
| Only needs a microwave | Requires an oven |
| Minimal dishes to clean | Lots of pans, bowls, mixers |
| Perfect for one | Made for sharing (or leftovers) |
What is an Oreo Mug Cake?
The Oreo Mug Cake Recipe isn’t just another dessert trend—it’s pure genius in a cup.
Born from a generation that loves quick, creative recipes, the Oreo Mug Cake takes one of the world’s favorite cookies and turns it into a warm, fluffy cake with minimal effort.
🍪 A Sweet Shortcut to Happiness
An Oreo Mug Cake Recipe is exactly what it sounds like:
- Crushed Oreo cookies
- A splash of milk
- Microwaved together in a mug
- Ready to eat in about one minute
There’s no mixing bowls, no electric mixers, and no fancy ingredients involved.
You don’t even need baking powder for the basic version (though it helps if you want a fluffier cake).
It’s the ultimate solution for:
- Late-night cravings
- Quick after-school snacks
- Easy kid-friendly cooking projects
- Single-serving desserts when you don’t want a full batch of cookies or cake
🌎 How the Oreo Mug Cake Went Viral
The Oreo Mug Cake Recipe went viral on platforms like TikTok and Instagram because it hits that sweet spot between novelty and nostalgia.
People were amazed that a childhood favorite snack could turn into an actual cake—using just a few everyday ingredients and a microwave.
Plus, it’s customizable:
- Add a drizzle of Nutella or peanut butter
- Stir in some mini chocolate chips
- Top it with whipped cream or a scoop of vanilla ice cream
Why You’ll Love This Oreo Mug Cake Recipe
✅ Ready in 2 minutes—super fast and easy!
✅ Only 3 ingredients—no eggs, no flour, no baking required.
✅ Minimal mess: Everything is mixed and cooked in a single mug.
✅ Endless variations customize it with Nutella, peanut butter, or ice cream.
✅ Microwave-friendly – No need for an oven or baking tools.
Ingredients for Oreo Mug Cake
This simple Oreo mug cake recipe requires just 3 ingredients, but you can add extras to enhance the flavor.
Main Ingredients:
| Ingredient | Quantity |
| Oreo Cookies | 4-5 pieces |
| Milk (any type) | 3 tablespoons |
| Baking Powder (optional for fluffiness) | ¼ teaspoon |
✨ Optional Add-ins to Upgrade Your Oreo Mug Cake
Want to make your mug cake even more epic?
Here are some easy mix-ins and toppings:
- Mini chocolate chips (for gooey melted pockets)
- Peanut butter or Nutella swirl
- Crushed nuts for crunch
- Whipped cream topping
- Scoop of ice cream (highly recommended!)
🍶 Recommended Tools for Easy Prep
You don’t need much to whip up the perfect Oreo Mug Cake:
| Tool | Purpose |
|---|---|
| Microwave-safe mug | To mix and cook everything inside |
| Spoon or small whisk | For crushing Oreos and stirring |
| Microwave | To bake the mug cake in under 2 minutes |
Step-by-Step Guide: How to Make Oreo Mug Cake in a Microwave
Making the perfect Oreo Mug Cake Recipe is as easy as crush, mix, microwave, and enjoy.
But for the best texture—light, fluffy, and just the right amount of gooeyness—you’ll want to follow a few simple steps.
Step 1: Choose the Right Mug
Before you start, it’s important to choose the correct mug for this recipe.
✅ Use a microwave-safe ceramic mug – Avoid plastic mugs, as they can melt or warp.
✅ Choose a large mug (at least 12 oz) – The cake will rise while microwaving, so a small mug might overflow.
✅ A wider mug works best – This helps the cake cook evenly.
For the best results, use a microwave-safe mug that is at least 12 oz to prevent overflow
Step 2: Crush the Oreos

Now, it’s time to prepare the base for the cake.
- Add 4-5 Oreo cookies to your mug.
- Use a fork or spoon to break them into smaller pieces.
- Continue crushing until you get fine crumbs – this will act as the “flour” for the cake.
For finer Oreo crumbs, use a rolling pin and crush them in a ziplock bag before mixing.
🔹 Pro Tip: If you want a super smooth batter, you can crush the Oreos in a ziplock bag using a rolling pin before adding them to the mug.
Step 3: Add Milk and Mix
- Pour 3 tablespoons of milk directly into the mug with the crushed Oreos.
- Stir the mixture using a spoon until the Oreos fully absorb the milk and form a smooth batter.
- Make sure there are no large cookie chunks left – this ensures even cooking.
🔹 Pro Tip: If you want a fluffier texture, add ¼ teaspoon of baking powder at this stage.
What Should the Batter Look Like?
The batter should be thick but not too dry. If it looks too dry, add ½ tablespoon more milk. If it looks too runny, add 1 extra Oreo and mix well.
Step 4: Microwave the Mug Cake
How Long to Microwave the Oreo Mug Cake?
- Place the mug in the center of the microwave.
- Microwave on high power for 60-90 seconds.
- Watch the cake carefully – it should rise but not overflow.
How to Know When It’s Done?
- The cake should look fully set and not wet in the center.
- Insert a toothpick – if it comes out clean, the cake is ready!
- If the cake is still wet, microwave in 10-second intervals until fully cooked.
🔹 Pro Tip: Every microwave is different! If your microwave is very powerful, start with 60 seconds and check. If needed, add more time in small increments.
Step 5: Let It Cool Before Eating
- Carefully remove the mug from the microwave – it will be HOT!
- Let the mug cake sit for 1-2 minutes before eating.
- Cooling allows the cake to firm up and prevents burns.
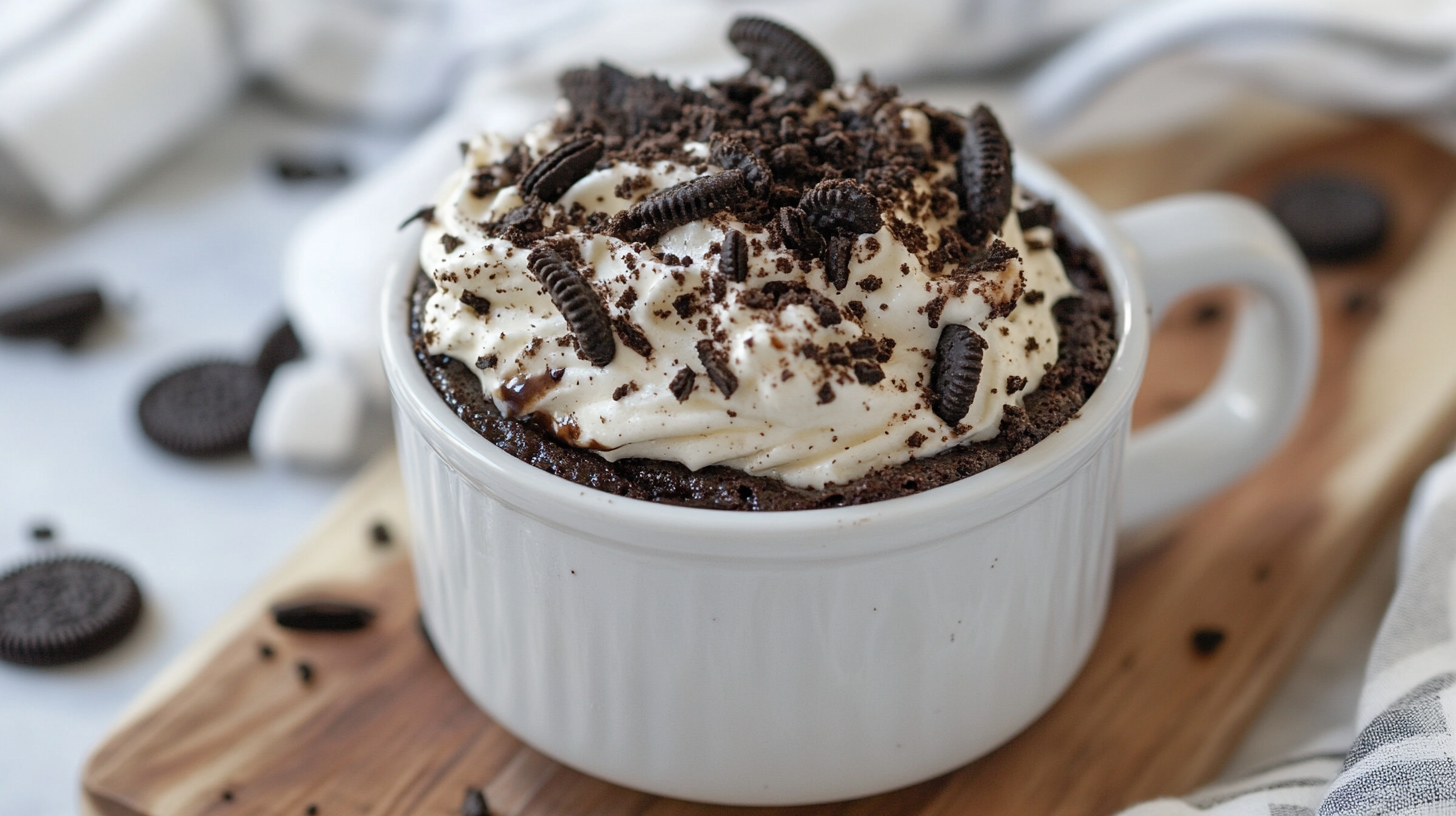
Step 6: Add Toppings (Optional but Recommended!)
Now that your Oreo mug cake is ready, let’s make it even better with some delicious toppings!
Best Topping Ideas for Oreo Mug Cake:
✅ Whipped Cream – Adds a light, creamy texture.
✅ Chocolate Syrup – Drizzle on top for extra chocolate flavor.
✅ Nutella or Peanut Butter – A rich, gooey topping.
✅ Vanilla Ice Cream – The perfect hot-cold combo!
✅ Crushed Oreos – Sprinkle extra Oreo crumbs for crunch.
✅ Chocolate Chips – Mix them in for a melty surprise.
Step 7: Enjoy Your Delicious Oreo Mug Cake! 🍫
Now comes the best part – eating your homemade Oreo mug cake! Grab a spoon and dig in while it’s still warm. The texture should be:
✔ Soft and fluffy
✔ Moist and chocolatey
✔ Rich with Oreo flavor
🔹 Pro Tip: Want to make it extra special? Serve it with a hot cup of coffee or cold milk for a perfect treat!
Extra Tips for the Best Oreo Mug Cake
Want to make sure your Oreo mug cake turns out perfect every time? Follow these expert tips:
✅Don’t overcook your Oreo Mug Cake: Too much time in the microwave makes it dry and rubbery.
✅ Experiment with Flavors: Try mint Oreos, golden Oreos, or red velvet Oreos.
✅ Make It Gooey: Add a piece of chocolate or Nutella in the center before microwaving for a molten lava cake effect.
✅ Use the Right Mug: A taller mug prevents overflow while microwaving.
For more indulgent dessert ideas, check out this Apple Fritter Cake.
Does the Oreo Mug Cake Really Work?
🔬 How the Oreo Mug Cake Recipe Works
When you crush Oreos and add milk, you’re essentially creating a simple batter.
- The crushed cookie pieces act like flour.
- The milk softens the cookies and helps bind everything together.
- In the microwave, the heat causes the sugar, fats, and flour inside the Oreos to cook into a soft, cake-like texture.
Even without adding eggs or oil, the Oreo Mug Cake sets into a moist, tender crumb in about one minute.
🔥 Common Concerns (and Solutions)
| Concern | Solution |
|---|---|
| Too dense | Add a little baking powder for extra lift |
| Too dry | Use a little extra milk (another ½ tbsp) |
| Overcooked | Microwave for slightly less time (start with 1 min) |
Oreo Mug Cake Variations – Customize Your Cake!
1. Oreo Mug Cake Without Milk
- Replace regular milk with almond milk, oat milk, or even water to make your Oreo Mug Cake recipe dairy-free and just as delicious
2. Oreo Mug Cake with Ice Cream
- Top the mug cake with a scoop of vanilla or chocolate ice cream for extra indulgence.
3. Peanut Butter Oreo Mug Cake
- Stir in a spoonful of peanut butter before microwaving for a nutty twist.
4. Double Chocolate Oreo Mug Cake
- Add 1 tablespoon of cocoa powder for a richer chocolate flavor.
5. Vegan Oreo Mug Cake
- Use plant-based milk and ensure your Oreos are vegan-friendly.
Why You’ll Love This Oreo Mug Cake Recipe
✅ Ready in 2 minutes—this Oreo Mug Cake is super fast and easy!
✅ Requires Only 3 Ingredients – No eggs, no flour, no baking!
✅ Customizable – Add toppings like ice cream, Nutella, or peanut butter.
✅ Microwave-Friendly – No oven required!
This mug cake recipe is perfect for late-night cravings, kids’ treats, or last-minute desserts.
Troubleshooting: Why Is My Mug Cake Not Perfect?
If your Oreo mug cake didn’t turn out as expected, here’s how to fix common issues:
| Problem | Solution |
| Cake is too dry | Add 1 tbsp extra milk and mix well. |
| Cake is too wet | Microwave for 10-15 more seconds. |
| Cake is rubbery | Reduce cooking time – microwaves vary! |
| Cake overflows | Use a larger mug next time. |
What You Need for the Best Oreo Mug Cake
Making a delicious Oreo Mug Cake Recipe is super easy, but a few basic tools and tips can help you get the best possible results every single time.
🏺 Choose the Right Mug
Picking the right mug is more important than you might think!
For the perfect Oreo Mug Cake Recipe, you should:
- Use a microwave-safe mug
- Pick one that’s at least 12 ounces or larger (to avoid overflow)
- Preferably choose a thick ceramic mug for even heating
✅ A larger mug allows your batter to rise without spilling over the sides.
🍴 Basic Tools to Make It Easy
You don’t need fancy equipment for this recipe—just:
- A fork or spoon (for crushing and mixing)
- A microwave (standard 800W–1200W models work great)
- Optional: small rubber spatula (for scraping down the sides neatly)
That’s it. Seriously simple!
📋 Quick Equipment Checklist:
| Item | Purpose |
|---|---|
| Microwave-safe mug | Baking and serving the cake |
| Fork or small whisk | Crushing and stirring |
| Microwave | Cooking the cake quickly |
FAQ:
Does the Oreo mug cake work?
Yes! An Oreo mug cake works by softening crushed Oreos with milk and microwaving the mixture to create a quick, fluffy cake. It’s an easy and delicious dessert that requires minimal ingredients and effort.
How to make an Oreo cake in a mug video?
You can find many Oreo mug cake recipe videos on YouTube or social media platforms. Simply search for “Oreo mug cake recipe” to watch step-by-step tutorials that show how to make it in just a few minutes.
How much milk do you put in an Oreo mug cake?
Typically, you need about 3 to 4 tablespoons of milk for a single-serving Oreo mug cake. The milk helps soften the Oreos, creating a smooth batter for microwaving.
How do you make a 3-ingredient microwave cake?
To make a 3-ingredient microwave cake, you need:
- Oreos (4-6 cookies, crushed)
- Milk (3-4 tablespoons)
- Baking powder (optional, for extra fluffiness)
Mix the crushed Oreos with milk until smooth, then microwave for 60-90 seconds until fully cooked.
Is it safe to microwave cake?
Yes, it is safe to microwave a cake as long as you use microwave-safe mugs or bowls and follow recommended cooking times. Be cautious when removing the mug from the microwave, as it can be very hot.
Final Thoughts: The Perfect Quick Dessert!
The Oreo Mug Cake Recipe is the ultimate quick dessert for when you’re craving something sweet but don’t want to bake. With only 3 ingredients and a microwave, you can make a soft, fluffy, and chocolatey cake in minutes.
✨ Try it today and let us know how it turned out!
Conclusion
This Oreo Mug Cake recipe is the ultimate quick dessert for anyone who loves Oreos and chocolate. With just 3 ingredients and a microwave, the Oreo Mug Cake is simple, delicious, and perfect for satisfying your sweet tooth anytime! With only 3 ingredients and a microwave, you can make a soft, fluffy, and chocolatey cake in minutes. Try different variations and toppings to make it your own!
PrintIrresistible Oreo Mug Cake Recipe for Quick Dessert Cravings
- Total Time: 3 minutes
- Yield: 1 mug cake 1x
Description
Satisfy your sweet cravings in just minutes with this quick and easy Oreo Mug Cake Recipe! Only 3 ingredients needed for a rich, fluffy, microwave cake that’s perfect for any time you need a fast dessert fix.
Ingredients
4–5 Oreo cookies
3–4 tablespoons milk
¼ teaspoon baking powder (optional, for extra fluffiness)
Optional toppings: whipped cream, chocolate chips, Nutella, or ice cream
Instructions
Crush the Oreos: Place the Oreos in a microwave-safe mug and crush them finely using a fork.
Mix with Milk: Add the milk to the crushed cookies and stir until a smooth batter forms. (Add baking powder if you want a lighter, fluffier texture.)
Microwave: Microwave on high for 1 to 1.2 minutes until the cake is puffed and cooked through.
Cool and Enjoy: Let cool for 1–2 minutes. Top with your favorite toppings like whipped cream or chocolate drizzle, and dig in!
Notes
Use a large (12oz) microwave-safe mug to prevent overflow.
If you like gooey centers, slightly undercook by 5–10 seconds.
Try using almond milk or oat milk for a dairy-free version.
- Prep Time: 2 minutes
- Cook Time: 1 minute
- Category: Dessert
- Method: Microwave
- Cuisine: American
Keywords: Oreo Mug Cake Recipe, quick dessert, 3-ingredient mug cake